
Scoping an area from start to finish
Scoping an area is the core Surfacely workflow. Master it and a three-bedroom house goes from 90 minutes of measuring to 30.
The six steps
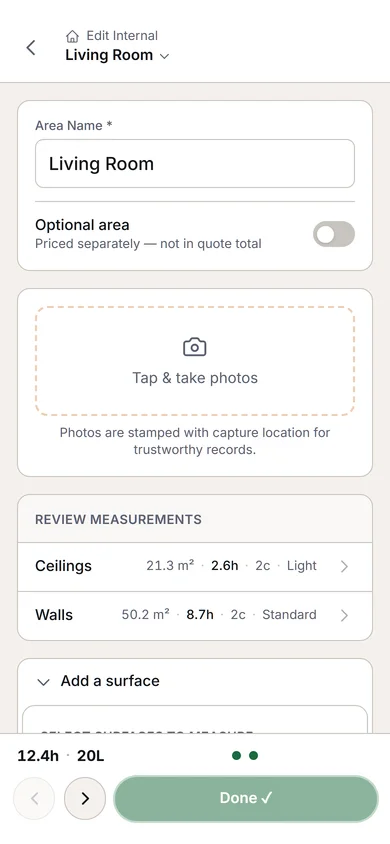
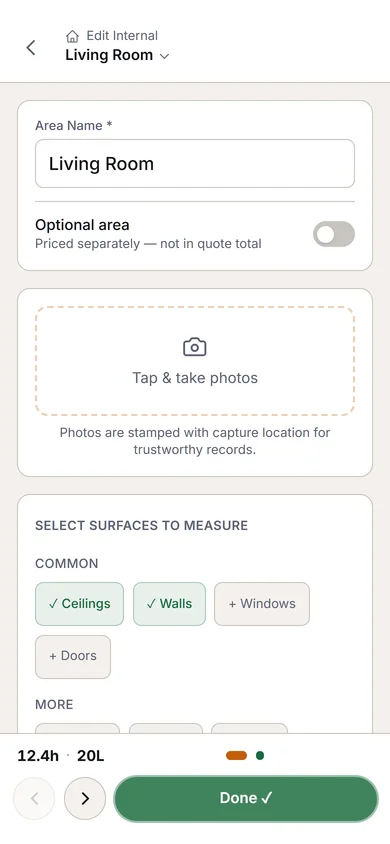
- Name the area. Open the building from your project, tap + Add area. Use a name that makes sense to the crew — "Kitchen", "North Elevation", "Master bedroom". You can also rapid-capture photos first and let Surfacely Assist suggest a name from them.
- Set the type. Internal or external. This affects which surfaces are offered and whether wash-down applies.
- Pick surfaces. Tap the surfaces in this area — walls, ceiling, doors, windows, skirting. Surfaces are permanent, so next visit you'll re-use them.
- Measure each surface. Tap a surface to open the measurement modal. Enter dimensions — Surfacely converts to m² automatically. For walls it's height × length × quantity; for doors it's per-unit; every surface has the right prompts.
- Assess condition. The assessment flow walks you through hazards, access, defects, exclusions. Anything that will affect your price or your crew's safety goes here.
- Review. A summary shows total m², total hours (estimated from the surfaces + speed steps), and any flags. If something looks off, fix it now.
Surfacely Assist runs in the background
As you take photos, Surfacely's AI analyses them and surfaces observations — detected defects, probable surface types, potential area names. It never blocks you, but the suggestions it offers can save real time, especially on condition assessment.
Why it matters: inconsistent scoping is what makes two painters quote the same job wildly differently. Surfacely's flow forces you through the same steps every time — so your second bedroom gets the same rigour as your first, even at 4pm on a Friday.
Tip: work one area at a time, front to back. Don't jump around. The permanent surface register assumes you've thought of everything in this area before you move on.